How to Crop a Stamp Online Without Clipping Fine Details
To crop a stamp online well, remove the unused canvas without letting the selection touch the visible mark. The finished file should keep the complete border, every required letter, and a small, even margin. That margin is not wasted space: it prevents edge pixels from being clipped and makes the stamp easier to position in a PDF, form, or layout.
The task sounds simple until the source contains a faint circular ring, a tilted impression, or text close to one side. A tight crop can look efficient in a large preview and still fail at normal document size. The workflow below treats cropping as a controlled preparation step, with separate checks for content, geometry, and placement.
Decide What the Crop Must Preserve
Before moving a selection box, identify the information that makes the stamp usable. This may include an outer ring, organization name, short status word, date area, central icon, registration text, or intentional ink texture. Write down the required elements if several people will review the file.
Start from the best available source. Cropping cannot restore a missing letter or reconstruct a border that falls outside the photo. If the image already cuts through the mark, return to the scan, export, or original design and create a complete source first. A larger canvas is harmless at this stage; missing artwork is not.
Also distinguish the visible stamp from nearby material. A scan may contain table rules, handwriting, page text, shadows, or a second impression. The crop should isolate the intended mark without implying that unrelated content belongs to it. When two marks overlap, use a cleaner source if one is available rather than making an uncertain manual repair.
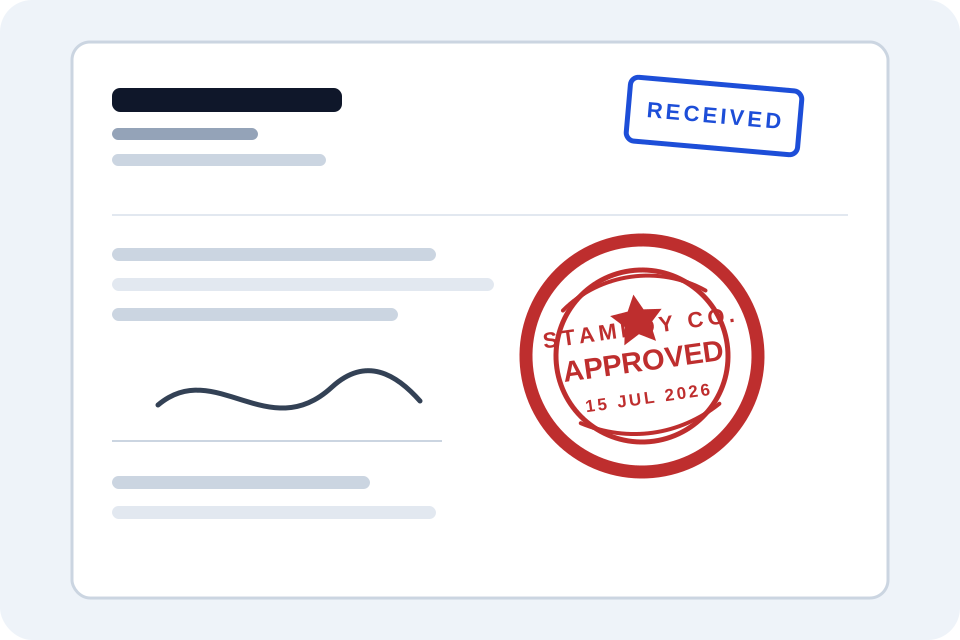
Check the source at a large view and then at approximately the size it will occupy in the document. The large view reveals stray pixels and broken edges. The smaller view reveals whether the words and overall silhouette still read correctly. Both views matter because a technically complete crop can still be awkward in use.
How to Crop a Stamp Online Step by Step
Open the Stampdy crop stamp tool and upload the image. The page accepts common browser-readable image files and shows the source beside the crop result, so you can compare the selected area without losing sight of the original.
1. Begin with a forgiving selection
Place the selection around the complete stamp and leave visible space on every side. Do not begin by chasing the smallest possible rectangle. A forgiving first selection makes the border easier to inspect and protects faint edge pixels that might be invisible against the editor background.
For a rectangular mark, use the rectangular crop unless the destination specifically needs a shaped mask. For a circular stamp, a circular selection can remove corner space, but it also makes the selection boundary part of the result. Keep the entire ring inside that boundary. If the circle is not perfectly centered in the source, position the selection around the artwork rather than around the original canvas.
2. Align the selection to the artwork, not the page
Scans and phone photos often include more paper on one side. Ignore that outer page balance. Center the selection around the visible stamp. Compare the clear space between the outermost ink and each crop edge, then adjust the selection until those margins feel deliberate.
Perfectly identical pixel margins are not always necessary. A stamp with a long descender, a side ornament, or an irregular worn edge may need more room on one side. The useful test is visual balance: when the cropped image is placed in a document, the mark should not appear to lean against an invisible edge.
3. Use precise controls for the last adjustment
Drag handles are convenient for the rough crop. For the final adjustment, use the available position and dimension controls or keyboard movement to make small changes. One-pixel movement is useful around fine borders; larger jumps are useful while centering a broad area.
Change one boundary at a time. If the top ring is close to the crop edge, move or expand the top without simultaneously tightening the other three sides. This makes the cause of any clipped detail obvious. Keep comparing the live result with the source after each meaningful change.
4. Check the result before cropping again
The crop-again option can be useful when a source contains a very large page and then a smaller region that needs precise trimming. Use the first pass to isolate the general area and the second to refine it. Avoid repeated crops simply to make the file feel tighter. Each new boundary decision is another chance to remove a faint pixel or create uneven padding.
Before a second pass, confirm that the first crop still contains every required element. If not, reset and correct the original selection. Repeatedly working from an already clipped intermediate file cannot recover what was removed.
5. Download and test the PNG
Download the result only after the preview passes the content and margin checks. Open the exported PNG independently. A checkerboard in the editor represents transparency; it is not part of the file. Confirm that transparent areas behave as expected in the destination application.

Place the PNG on a copy of the intended PDF or form at the actual working size. Check whether the visible mark appears centered when the image box is aligned. If it looks offset, the problem may be unequal transparent margins rather than the document tool. Return to the source and adjust the crop instead of compensating with inconsistent placement each time.
How Much Margin Should a Cropped Stamp Keep?
There is no single correct pixel value for every stamp. The right margin depends on image resolution, edge softness, intended placement size, and whether the mark has a complete outer border. Use a practical rule: keep enough transparent space that no visible or semi-transparent edge pixel touches the canvas, then add a modest buffer for placement.
Too little margin creates three problems. Anti-aliased edge pixels may be cut, a shadow or ink texture may end abruptly, and a document editor may make the mark feel crowded even when it is technically complete. Too much margin creates a different problem: the image box becomes much larger than the visible stamp, making alignment, scaling, and selection frustrating.
Inspect all four sides against a contrasting background. A pale red edge can disappear on white but become obvious on gray. If the destination may use colored pages, test more than one background. The goal is not to preserve random paper noise; it is to preserve the full intended shape and a predictable placement buffer.
For a worn physical impression, decide whether irregular gaps are part of the source or artifacts outside the mark. Cropping should not redesign the impression. Preserve meaningful texture inside the intended boundary, but exclude isolated dust or scanner marks that clearly sit beyond it.
Crop First or Rotate First?
The order depends on the source. If the image contains a full page with a small tilted stamp, make a loose crop first to remove most unrelated content. Then use the rotate stamp tool to straighten the isolated area. Finish with a final crop after rotation because rotation usually changes the canvas dimensions and creates transparent corners.
If the source is already tightly framed and only slightly tilted, rotate first, then crop once. This avoids trimming a border that moves closer to the edge during rotation. In both cases, keep an untouched original. Do not build a long chain of saved copies without clear filenames, because reviewers may lose track of which file contains the complete source.
Cropping should generally happen before final resizing. Removing large unused margins first lets the requested width and height describe the visible stamp more accurately. After the crop is approved, the resize stamp tool can create a placement-size copy while preserving the approved master.
Quality Checks for Circular, Square, and Text Stamps
Circular stamps need special attention at the top, bottom, left, and right extremes of the ring. A circle can look complete while one anti-aliased edge is touching the canvas. Compare all four points and inspect curved lettering near the outer ring. A circular mask should follow the intended composition without cutting an ornament that extends beyond the ring.
Square and rectangular stamps reveal uneven margins quickly. Use the straight border as a reference, but do not assume the border is perfectly aligned in a photographed impression. Preserve the full design first. Straightening is a separate decision and should be made only when the tilt comes from the capture rather than the original artwork.
Text-only stamps may not have a protective border. Pay attention to ascenders, descenders, punctuation, and the outer strokes of the first and last characters. A tight crop around capital letters can remove the bottom of a lowercase g or the dot of an i. Include the entire line and check it at normal reading size.
Marks with a date or number field need enough room for every character position, including faint zeros and narrow ones. Do not crop based only on the darkest pixels. Verify the actual wording against the source, and stop if a required character is ambiguous.
Common Cropping Errors and Their Fixes
The outer ring is flat on one side. The selection crossed the ring or its softened edge. Expand that boundary and inspect the source on a contrasting background.
The stamp looks off-center in a PDF. Compare transparent margins on all sides. Rebalance the crop around the visible artwork instead of nudging every future placement by eye.
A circular crop removes a corner symbol. Use a rectangular crop or enlarge the circular selection. Shape choice should follow the artwork, not force it into a cleaner silhouette.
The file still contains too much blank space. Make one controlled refinement, watching the nearest required pixel. Do not repeatedly crop from successive exports when the original source remains available.
Small lettering looks softer after the workflow. Cropping itself should not require enlargement. Check whether the source was resized during another step. Return to the highest-quality original, crop it, and create smaller delivery copies only afterward.
Frequently Asked Questions
Should a stamp border touch the crop edge?
No. Leave a small transparent margin outside the visible border. This protects softened edge pixels and makes the image easier to position without looking cramped.
Is a circular crop always better for a round stamp?
Not always. Use it when every required element fits comfortably inside the circle. Choose a rectangular crop when ornaments, text, or natural ink texture extend beyond the circular boundary.
Can I crop a stamp from a phone photo?
Yes, provided the complete mark is sharp, evenly lit, and not distorted by perspective. If the photo cuts through the stamp or makes one side much smaller, recapture it before cropping.
Should I crop before resizing the stamp image?
Usually, yes. Approve the visible area and margins first, then resize a copy. That makes the output dimensions describe the stamp rather than a large amount of unused canvas.
Conclusion
To crop a stamp online for reliable reuse, confirm that the full border, wording, date, and symbols match the source; no visible edge touches the canvas; transparent margins are visually balanced; and the exported PNG looks correct at its real placement size. Keep the original and the approved crop as separate files. Once those checks pass, resize or place the approved crop without making another uncertain trim.